I was just brand new married. It was 16 1/2 years ago and I was sitting in a "Homemaking" meeting in UT - where I was going to school. It was an all-things-baby or baby-shower-themed meeting or something. A lady taught a demonstration on how to make your own Baby Wipes. She then gave the wipes she had just made to the next-due lady in the room. I was in awe. Who thought you could make your own baby wipes? Not me.
We were all given the recipe and that's all I really remember about that meeting. But I saved the recipe. And good thing - because fast forward a few years and I have just had my first baby. Tyler and I are still poor college students, and all that baby stuff was expensive! I dug out that recipe. I invested in a good Rubbermaid container and all the ingredients and hoped for the best.
To my surprise, it was VERY EASY! And they worked! I was a believer. And I have used this recipe ever since. It works out to be much cheaper than buying wipes. The baby oil and baby wash last a long time. If you buy the paper towels in bulk, they are only an initial investment and last a long time too.
Don't get me wrong - I have bought wipes too, on occasion, when I have a killer coupon that makes them free or some other good deal - but I still think these clean up a little better, they are more moist, and my kids have never had a diaper rash when using them.
Even now, as I make what I hope to be my last batch, I still swear by using homemade wipes.
We are currently potty-training our last child.
Our bathroom has looked like this, with the two-toilet scenario, for many of the last 14 years.
We use the M&M method: 1 for #1 and 2 for #2. He has almost finished this jar of candies. And he doesn't even always remember that he wants a candy afterward. That's a good sign that he has created good potty habits and there are hardly any accidents anymore. Of course, if running out of candy causes a regression, buy more candy - you may need it just a little longer. (Night-time potty-training is a totally different story. At that point we do a chart and there is a big reward when the chart is full...a future post)
Anyway, back to the wipes.
I will give you the recipe first.
Ingredients
*
Rubbermaid or other
container in roughly the same size and shape as a half-roll of paper towel. (even a LARGE margarine spread container works, I'm told)
*
Paper towel roll, cut in half (Bounty works the very best)
*2 cups
water
*1 T.
Baby oil
*2 T.
Baby wash
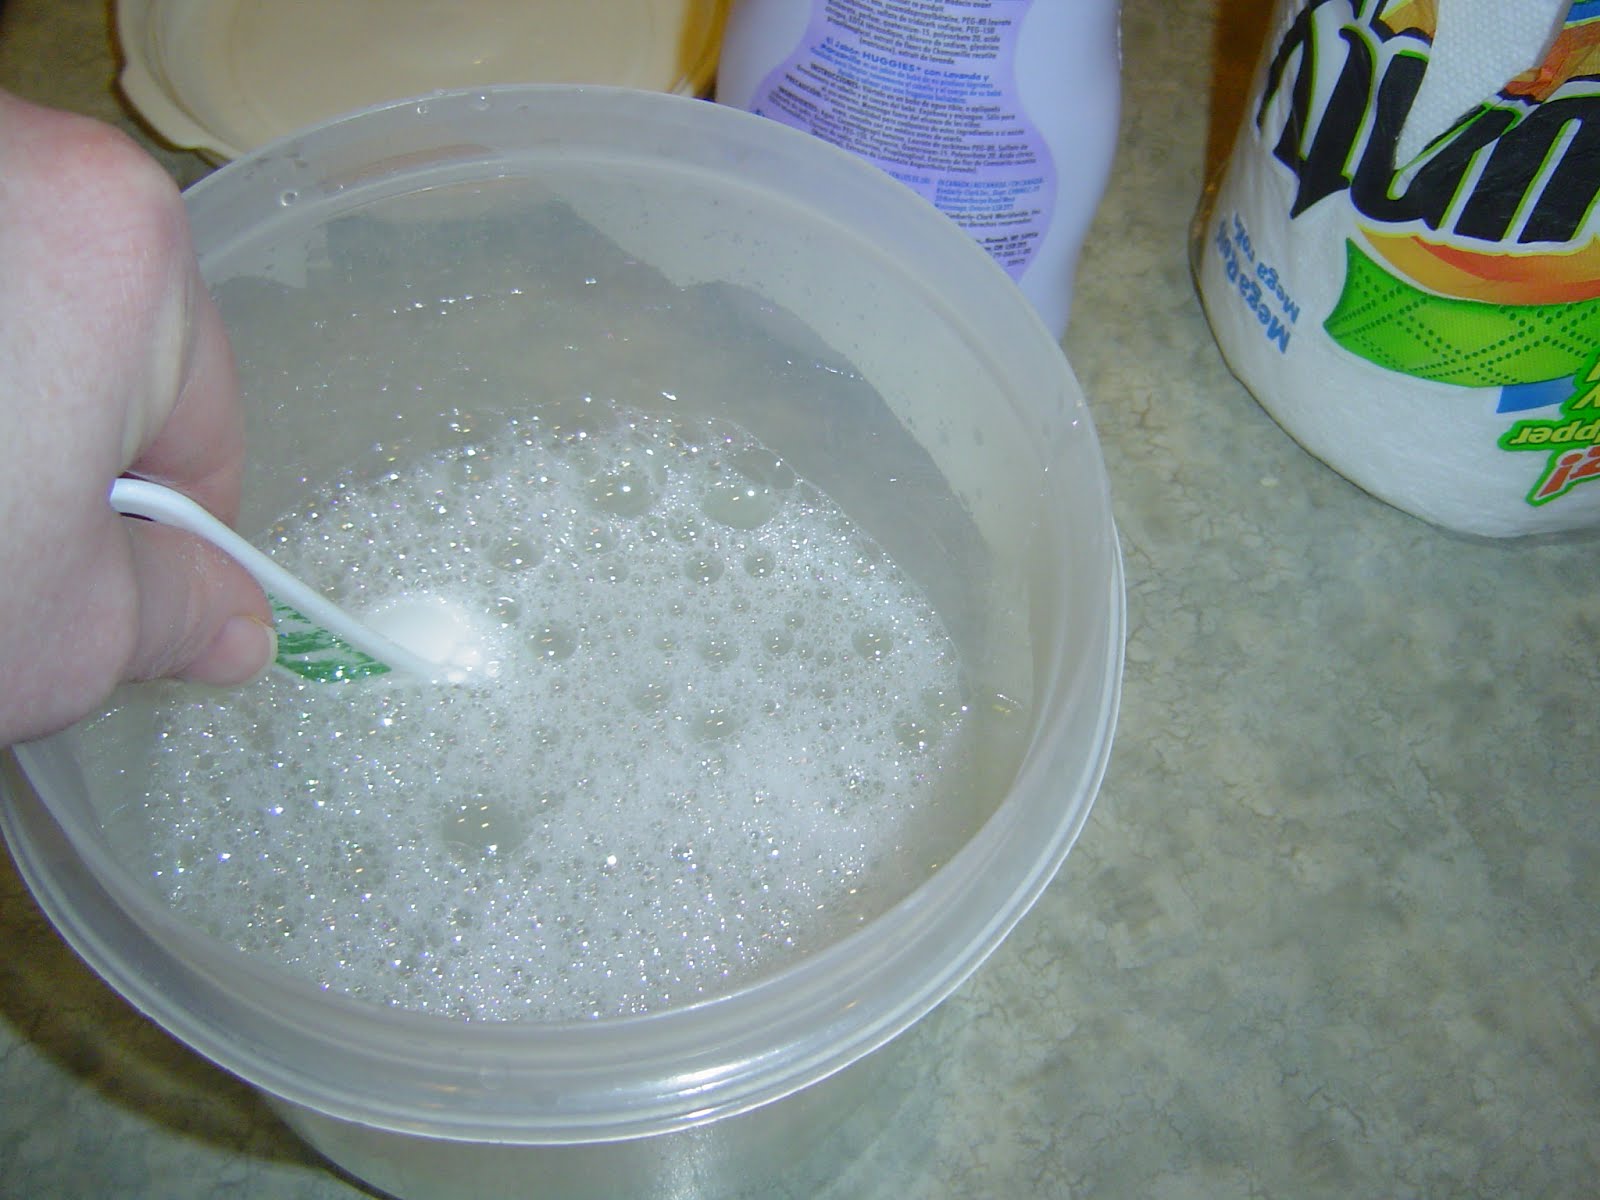
Pour 2 cups of water into your container. Set the lid on top but do not click shut. (This will sterilize the lid along with the container and the water). Boil in microwave on high for 4 minutes.
Careful when taking it out of the microwave - it's very hot and container will be soft. Pour in 1 T baby oil and 2 T baby wash.
Stir really well.
While the water is boiling and sterilizing in the microwave, cut your paper towel roll in half. I have a knife just for this. Because it gets kind of dull for anything else. Just grab the roll, eyeball the middle, and start cutting. Sounds weird but it's not really that hard. Just
saw until you get through the cardboard core. Then put your fingers in with each hand and pull the rest apart. Easy-peasy.
Slowly (you don't want it to splash up on you) insert the cut side of the paper towel roll first into the container. Don't bother taking out the cardboard core yet. It will come out easier later. Push the paper towel roll down all the way.
Put the lid on and click it shut. Turn the container upside down for at least 10 minutes so it can cool and the liquid can coat all the towel.
As the pressure builds a little while it's cooling, it may pop up on you.
Just push it down again. You may have to do this a few times. No biggie.
When it feels cool, turn it back over. The lid should be on nice and secure. And all the towel should be damp. (Note: if you happen to leave the lid off later on or for some other reason they dry out, just spritz with water until they are damp again and they will be just fine.)
Take it off and pull out the core now. I also take a little paper towel out with it, to get rid of the cardboardiness.
Now you just pull out your wipes from the middle. It will break at the original perforations from the paper towel. Use however many you think you need.
If you use Bounty, you will be pleased that it does not need to be as
thick to feel like it's working. AND the Select-A-Size Bounty is GREAT because you can
select your size at the perforation marks.
Try it! I promise you will be pleasantly surprised.
Pin It
Do you need to go make some homemade Baby Wipes?
I am linked up to:


I was featured on:
 http://4you-withlove.blogspot.com/2012/02/homemade-baby-wipes-and-more.html
~If you are interested in receiving updates and future posts from this blog, please sign up to "FOLLOW" on the top right of this page. Let's keep in touch!~


